

I have seen a few operators get torn up on social media for not having a level horizon recently. In my experience, the DJI MAVIC is particularly susceptible to not having an uneven horizon after powering on. Using a non-level surface while powering up the Mavic is the problem, usually.
Below is a step by step guide to fixing the horizon on your DJI product. Click here to watch a 40-second video.
Press the three horizontal dots in the top-right corner of DJI GO APP
Tap the camera icon on the left side - 6th image from the top
Click “Adjust Camera Gimbal”
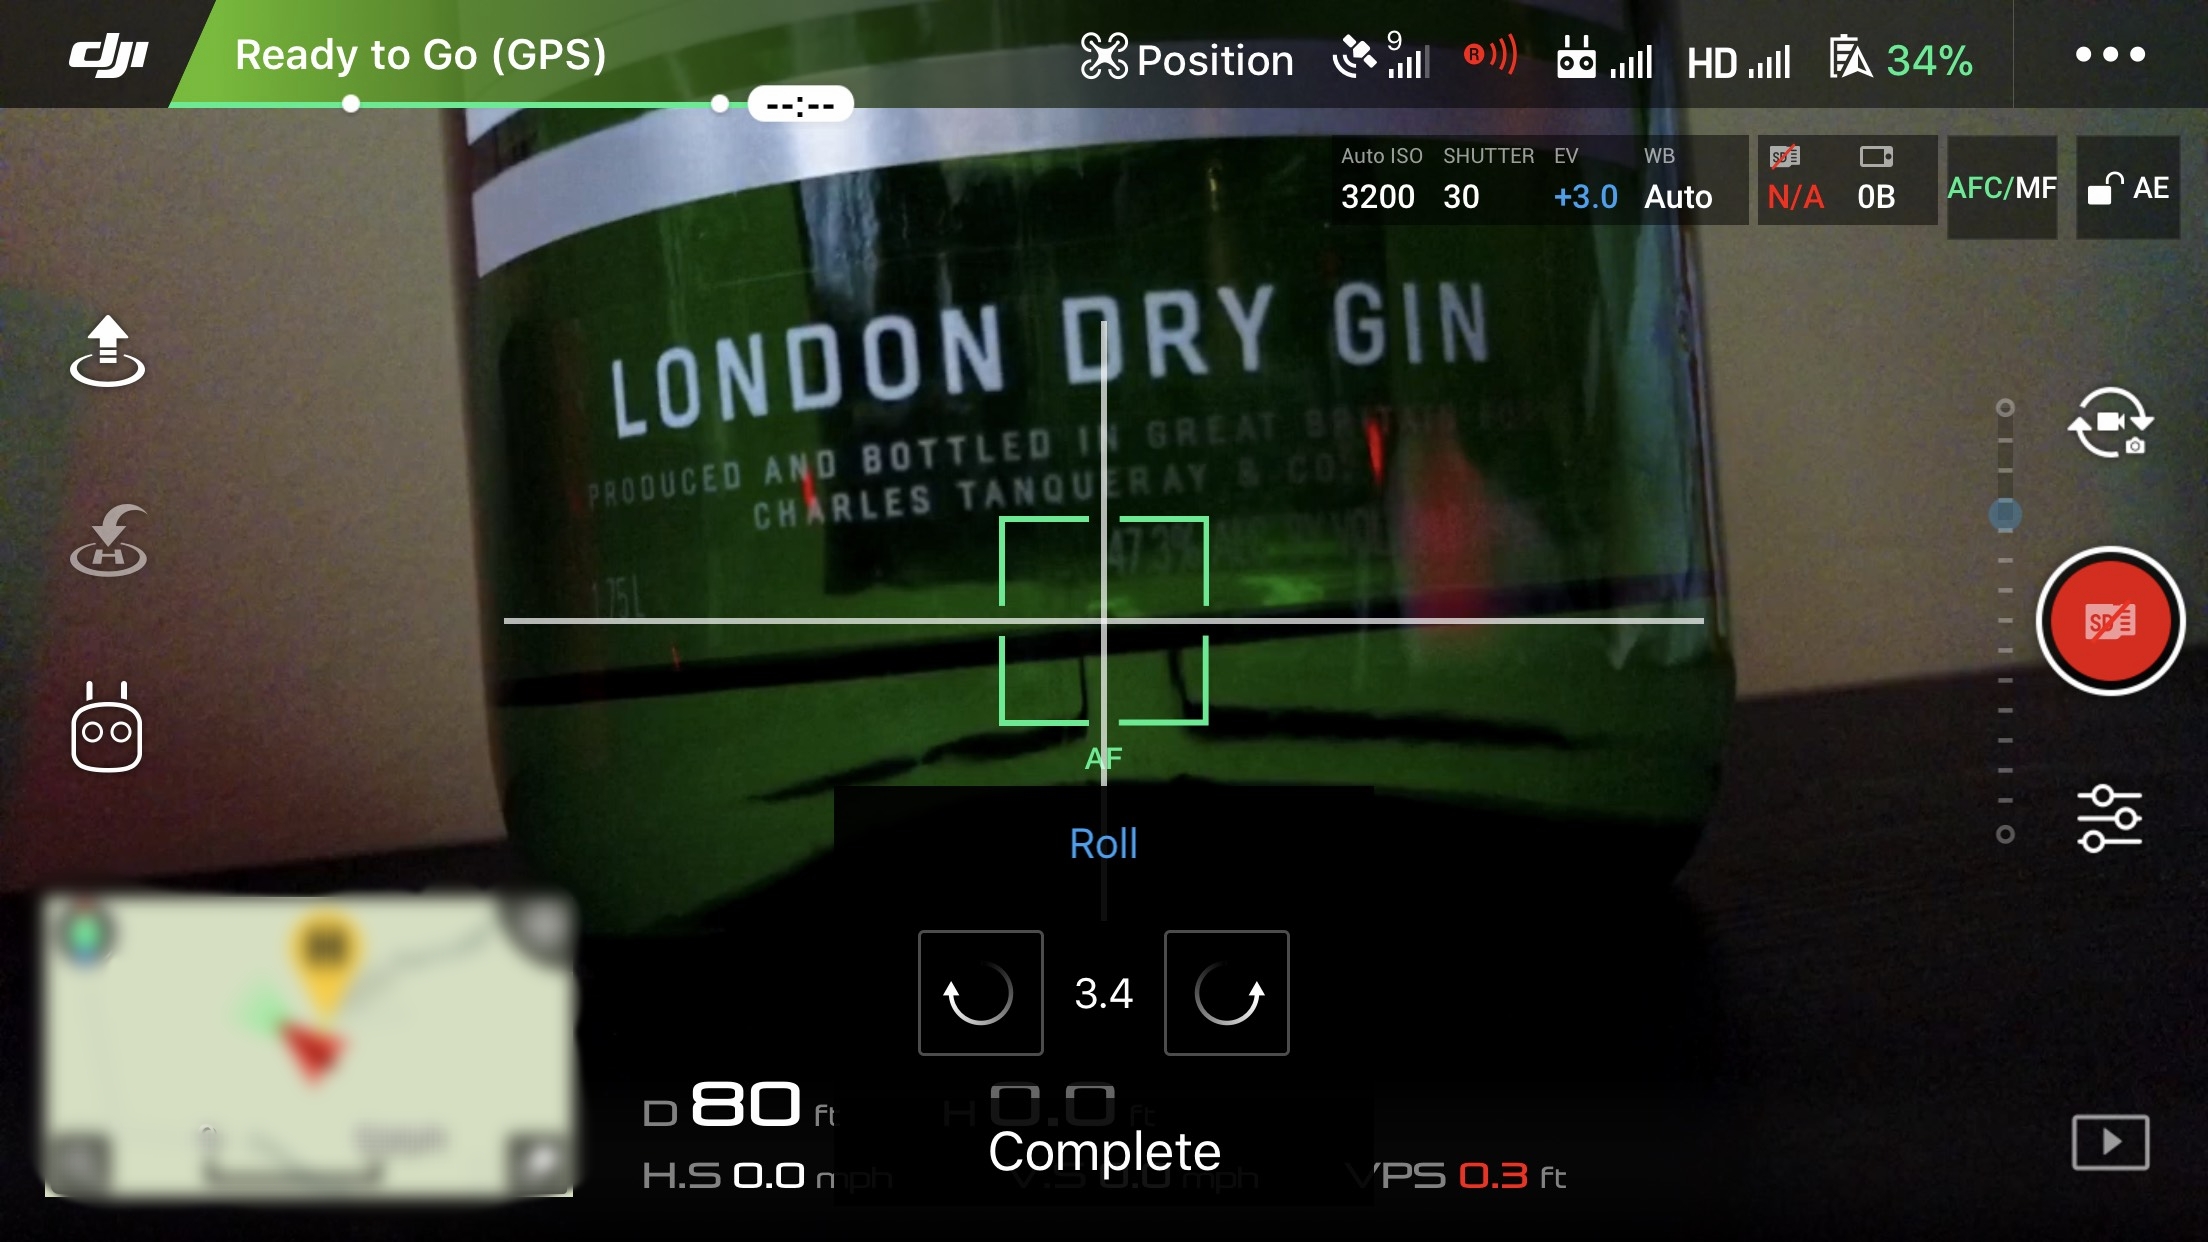
Use the vertical and horizontal guidelines to manipulate the gimbal level using the two arrows
Once you’ve perfected the horizon, press “Complete” and have some fun!
Below are a few pictures comparing before and after the horizon has been adjusted.
Before correcting the horizon

After fixing the horizon
Always verify you’re powering up on a level surface. If you use a pre-flight checklist when flying, add this as a step before taking off. Taking 30 seconds to complete this procedure will ensure you don’t have to worry about correction during post-production.
If you have any questions or would like another tutorial completed, please contact me.